How to Take Business Headshots: The Complete Guide
Your business headshot appears everywhere — LinkedIn, company websites, email signatures, business cards. A great one opens doors. A bad one? Well, let’s make sure that doesn’t happen. This guide covers three ways to get professional headshots: DIY at home, hiring a photographer, or using AI. Find the method that fits your budget, timeline, and comfort level.


- DIY is free but tricky. With proper lighting and technique, your smartphone can produce decent results. Budget 30-60 minutes.
- Photographers deliver the best quality. Expect to pay $150-500 and wait 1-2 weeks. Worth it for executives and high-stakes situations.
- AI is the fastest and most affordable. Upload selfies, get professional headshots in 10 minutes for $29-50. Best value for most people.
- Lighting matters most. Regardless of method, natural window light beats everything. Avoid overhead lights and direct sun.
Why Business Headshots Matter
First impressions happen fast. On LinkedIn, you have about 2 seconds before someone decides whether to keep scrolling or click your profile. Your headshot does the heavy lifting.
The numbers back this up: LinkedIn profiles with professional photos get 21x more views and 36x more messages than those without. That’s not a small edge — it’s a completely different experience on the platform.
Beyond LinkedIn, your headshot shows up everywhere: company “About” pages, business cards, email signatures, conference badges, press mentions, and Slack profiles. One good photo works across all of them.
Every 2-3 years, or sooner if: you’ve changed your hairstyle significantly, started wearing glasses (or stopped), or when the photo no longer looks like you in real life. Starting a job search? Update it now.
Three Ways to Get Business Headshots
There’s no single “right” way to get a headshot. The best method depends on your budget, timeline, and how comfortable you are in front of a camera. Here’s a quick comparison:
| Method | Cost | Time | Quality | Best For |
|---|---|---|---|---|
| DIY at Home | Free | 30-60 min | Variable | Tight budget, camera-savvy |
| Professional Photographer | $150-500 | 1-2 weeks | Highest | Executives, teams |
| **AI Headshots** | **$29-50** | **10 minutes** | **Professional** | **Most professionals** |
Let’s break down each method so you can choose what’s right for you.
Method 1: DIY Business Headshots at Home
With the right setup, your smartphone can produce surprisingly professional results. The secret isn’t expensive equipment — it’s understanding light, background, and composition. Here’s exactly how to do it.
Equipment You Need
Good news: you probably already have everything.
- Smartphone: iPhone 11 or newer, or equivalent Android. Anything from the last 3-4 years works.
- Tripod or stable surface: A stack of books works. Anything to keep the phone steady at eye level.
- Timer or remote: Use the built-in self-timer, or ask someone to help.
- Natural light source: A large window is your best friend.
The front-facing “selfie” camera uses a wide-angle lens that distorts your face — making your nose look bigger and ears smaller. Use the back camera with 2x optical zoom (if your phone has it) for much more flattering results.
Setting Up Your Lighting
Lighting makes or breaks a headshot. The goal: even, soft light on your face with no harsh shadows.
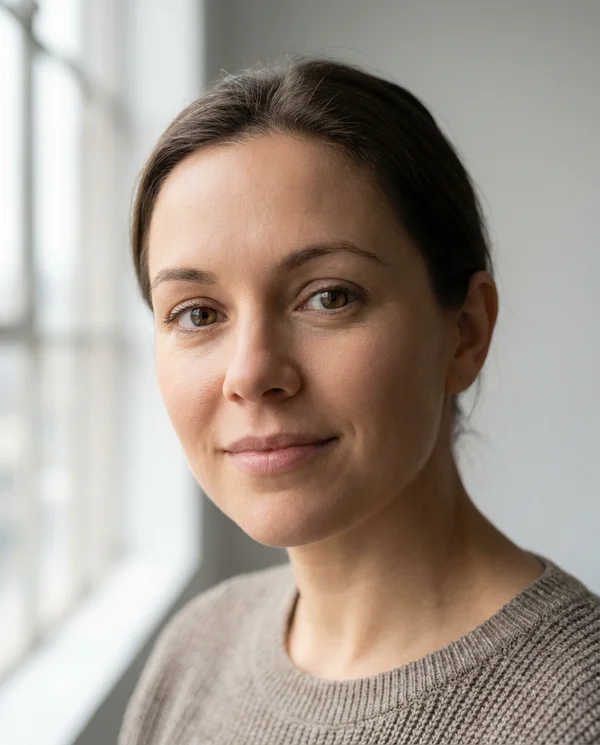
Soft window light = professional, flattering result
- Face a large window with indirect sunlight
- Shoot in morning or late afternoon light
- Use sheer curtains to diffuse harsh sun
- Stand in open shade outdoors

Direct sunlight = patchy shadows, unprofessional look
- Direct sunlight (harsh shadows, squinting)
- Dappled light through trees (patchy shadows on face)
- Overhead ceiling lights (shadows under eyes)
- Backlighting (window behind you)
Choosing Your Background
Simple backgrounds keep the focus on your face. You don’t need a studio — just an uncluttered space.
Good backgrounds: Plain white or gray wall, solid-colored wall, blurred greenery outdoors, neutral bookshelf (not cluttered).
Avoid: Busy patterns, messy rooms, bathroom mirrors, car selfies, obviously cropped group photos.
Make sure your outfit contrasts with your background. Dark blazer against a light wall, or light shirt against darker background. If you blend in, the photo won’t pop.
What to Wear
The short version: solid colors, well-fitted clothes, one level up from your daily work attire.
- Best colors: Navy blue, burgundy, emerald green, charcoal gray
- Avoid: Busy patterns, logos, stripes, pure white (can blow out), neon colors
- Fit matters: Baggy clothes look sloppy. Tailored looks professional regardless of price.
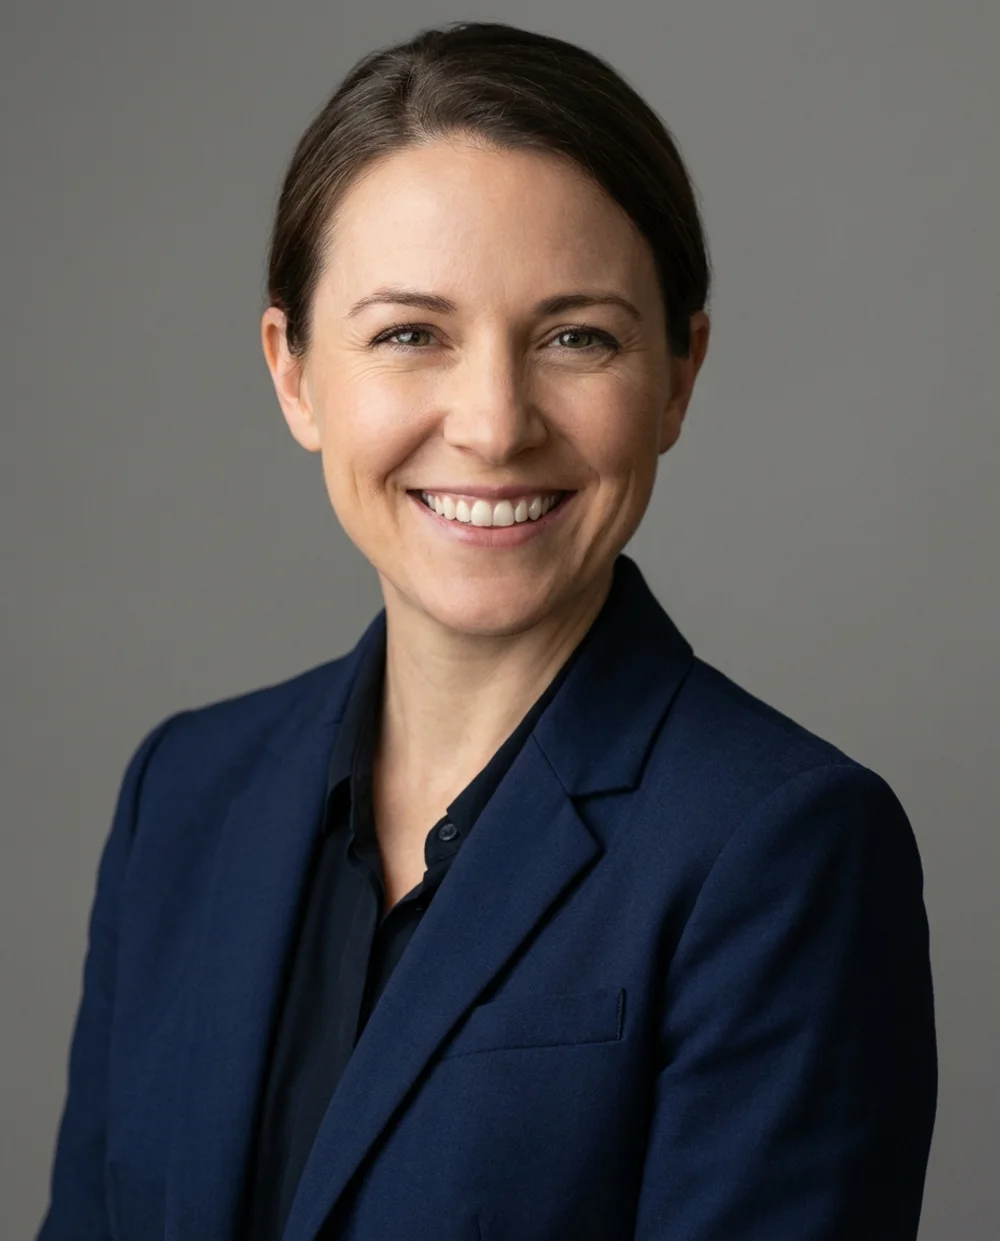
Posing & Expression
Most people tense up in front of a camera. These tricks help you look natural:
- Posture: Stand straight, shoulders back, lean slightly toward the camera
- Chin: Push it forward and slightly down — eliminates double chin, defines jawline
- Angle: Turn your body 15-30° instead of facing dead-on (more dynamic)
- Eyes: Look directly at the lens, slightly squint (“smize”) to avoid deer-in-headlights look
- Expression: Think of something that makes you genuinely happy right before the shot
Take at least 20-30 photos. Try smiling with teeth, soft smile, and neutral expression. You’ll have options to choose from later.
Camera Settings & Technique
How to Take Business Headshots with Your Phone
Clean Your Lens
Sounds basic, but fingerprints on the lens make photos look hazy. Wipe with a soft cloth.
Use the Back Camera
Higher quality than the selfie camera. Set up your phone on a tripod or stable surface.
Enable Portrait Mode (Optional)
Creates background blur to mimic professional photos. Works best with good lighting.
Frame the Shot
Position yourself so both shoulders are visible with some space above your head. Leave room to crop later.
Set Timer and Shoot
Use a 3-10 second timer. Take lots of photos with different expressions. More options = better final result.
DIY Headshot Checklist
- Lens is clean and smudge-free
- Good lighting (facing window, no overhead lights)
- Simple, uncluttered background
- Professional outfit with contrast to background
- Hair styled, makeup done (if applicable)
- Phone at eye level or slightly above
- Back camera with 2x zoom (not selfie camera)
- Both shoulders visible in frame
- Timer set, remote ready, or helper available
Basic Editing
Don’t over-edit. A few simple adjustments:
- Crop: Head and shoulders, some space above head
- Brightness/exposure: Make your face clearly visible
- Contrast: Slight boost can add definition
- Don’t: Heavy filters, excessive smoothing, dramatic color changes
DIY Pros & Cons
Pros:
- Free (just your time)
- Complete control
- Immediate results
- Can reshoot anytime
Cons:
- Quality depends on your skill
- No professional guidance
- Limited by equipment
- Time-consuming to get right
Method 2: Hiring a Professional Photographer
When quality matters most and budget allows, nothing beats a professional. They handle lighting, posing, equipment, retouching — you just show up.
When to Hire a Photographer
- Executive or leadership positions (impressions matter more)
- Company-wide team headshots (consistency is key)
- High-stakes situations (fundraising, board positions, major career moves)
- Your company is paying (why not get the best?)
- You’re uncomfortable taking photos yourself
What to Expect
Session length: 15-60 minutes depending on package
Turnaround: 1-2 weeks for edited photos (rush available for more $$$)
What’s included: Professional lighting, multiple poses, retouching, digital files
Preparation: Bring 2-3 outfit options. Photographer will advise on location, poses, and expressions.
Cost Breakdown
| Session Type | Price Range | What You Get |
|---|---|---|
| Mini Session | $100-200 | 15-20 min, 1-2 final images |
| Standard Session | $200-350 | 30-45 min, 3-5 final images |
| Premium/Executive | $350-500+ | 60+ min, multiple looks, 5-10+ images |
| Team Rates | $75-150/person | On-location, consistent style for all |
Prices vary significantly by city. NYC and LA are at the high end; smaller markets are more affordable.
How to Find a Good Photographer
- Search “[your city] headshot photographer” or “corporate headshots [city]”
- Check portfolios — do they match the style you want?
- Read Google/Yelp reviews for red flags
- Ask about turnaround time and retouching policy
- Look for someone who makes you feel comfortable (you’ll take better photos)
Photographer Pros & Cons
Pros:
- Highest possible quality
- Expert guidance on posing, lighting
- Professional retouching included
- Consistent results for teams
Cons:
- Most expensive option ($150-500+)
- Requires scheduling, travel
- Wait time for delivery (1-2 weeks)
- Can feel awkward for some people
Method 3: AI Business Headshots
AI headshots are the newest option — and for most people, the best balance of quality, speed, and cost. Here’s how they work and what to expect.
How AI Headshots Work
How to Create AI Business Headshots
Upload 10-15 Casual Selfies
Regular photos from your phone. Different angles and expressions help. No special lighting or equipment needed.
AI Learns Your Face
The AI analyzes your facial features — bone structure, skin tone, unique characteristics — to create a model of you.
Choose Professional Styles
Pick from business, corporate, creative, or other styles. The AI generates professional outfits, lighting, and backgrounds.
Download Your Headshots
Get studio-quality photos with your actual face. The whole process takes about 10 minutes.
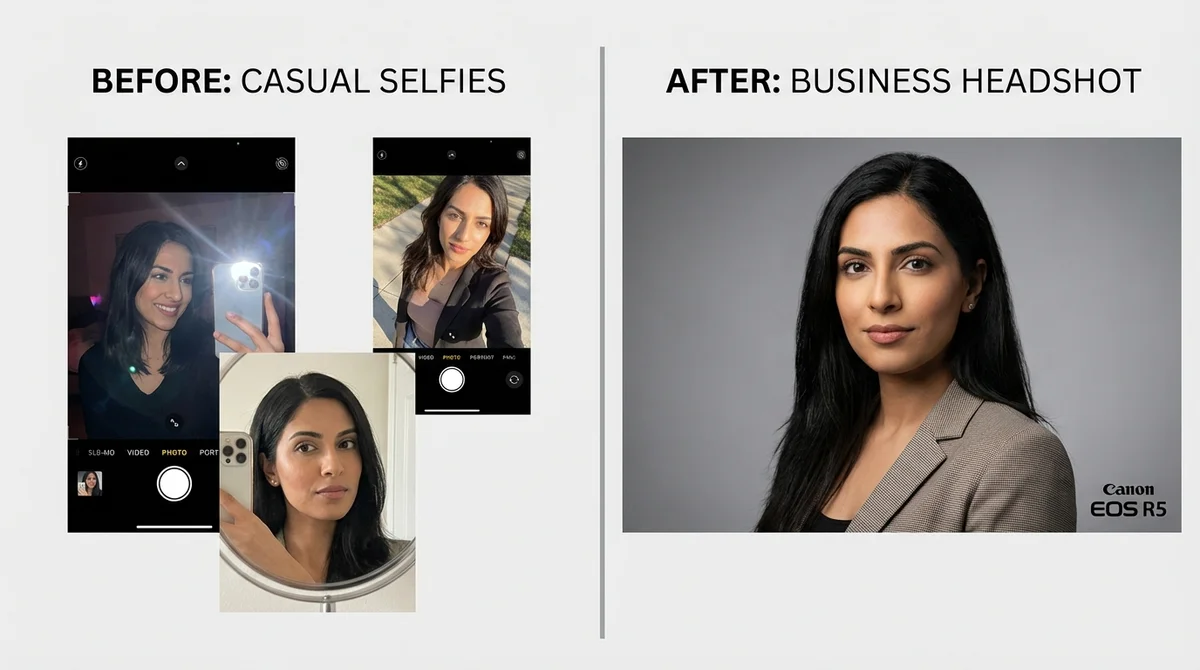
Upload everyday selfies, get studio-quality headshots in minutes
What You Get
- Professional lighting: Studio-quality lighting generated by AI
- Any outfit you want: Navy suit? Burgundy blazer? The AI generates it on you
- Clean backgrounds: Studio gray, soft blur, office settings — your choice
- Multiple styles: One upload, dozens of different looks
- No awkward posing: The AI handles positioning and angles
Tips for Best AI Results
Upload Photos That…
- Show your face clearly (no sunglasses)
- Include different angles (front, slight turns)
- Have good lighting (can be casual)
- Show different expressions
Avoid Photos With…
- Heavy filters or editing
- Other people’s faces
- Very low resolution
- Extreme angles or cropping
AI Pros & Cons
Pros:
- Fast: 10 minutes total
- Affordable: $29-50
- No scheduling needed
- Try unlimited outfits
- No awkward posing
- Consistent, professional results
Cons:
- Requires decent source photos
- Some prefer “real” photos
- Quality varies by service
- Not ideal for unusual requests
Upload selfies, see your AI headshot preview — completely free. Only pay if you love the results. Cancel anytime, no questions asked.
Start Free Trial →Which Method Should You Choose?
Here’s a side-by-side comparison to help you decide:
| Factor | DIY | Photographer | AI |
|---|---|---|---|
| Cost | Free | $150-500 | **$29-50** |
| Time | 30-60 min | 1-2 weeks | **10 minutes** |
| Skill Required | Medium | **None** | **None** |
| Quality Ceiling | Medium | **Highest** | High |
| Outfit Options | What you own | What you bring | **Unlimited** |
| Awkward Posing? | Self-conscious | With stranger | **None** |
| Best For | Zero budget | Executives | **Most people** |
Quick Decision Guide
Choose DIY if…
- You have zero budget
- You’re comfortable with cameras and lighting
- It’s not a high-stakes situation
- You have time to experiment and learn
Choose a Photographer if…
- You’re in an executive or leadership role
- Your company is paying
- You need team-wide consistency
- It’s a major milestone (promotion, fundraising, board position)
- Budget is not the primary concern
Choose AI if…
- You need headshots quickly
- You want professional results on a budget
- You hate photo shoots and awkward posing
- You want to try multiple looks and outfits
- You’re updating your LinkedIn profile
- You’re a working professional who values time
Business Headshot Tips (Any Method)
Regardless of which method you choose, these principles apply:
The 3-Second Test
Show your headshot to someone for 3 seconds, then hide it. Ask them:
- Would you trust this person?
- Do they look approachable?
- Do they look competent?
If the answer is “yes” to all three, you’ve got a winner.
Common Mistakes to Avoid
Red Flags That Make You Look Unprofessional:
- Outdated photo (more than 3 years old)
- Obviously cropped from group photo
- Vacation or casual setting visible
- Bathroom mirror selfie
- Car selfie with seatbelt visible
- Heavy filters or excessive retouching
- Bad lighting (shadows, yellow tint)
- Distracting background
- Different person than you look like now
Platform-Specific Tips
LinkedIn: Professional but approachable. Smile with teeth. Square crop works best. This is your #1 priority.
Company Website: Match the team’s style if there is one. Slightly more formal than LinkedIn is fine.
Email Signature: Keep it small and square. Simple background so it doesn’t clash with email design.
Business Cards: High resolution (300 DPI) is essential for print. Test how it looks small before committing.
Frequently Asked Questions
-
How much do business headshots cost?
Costs vary by method: DIY at home is free (just your time), professional photographers charge $150-500+ depending on location and experience, and AI headshot services cost $29-50 for professional results in minutes.
-
What should I wear for a business headshot?
Wear solid colors like navy blue, burgundy, emerald green, or charcoal gray. Avoid busy patterns, logos, and stripes. Dress one level up from your daily work attire — if you usually wear business casual, opt for a blazer.
-
Can I take a professional headshot with my phone?
Yes, modern smartphones can produce good results with proper technique. Use the back camera (not selfie camera) with 2x zoom if available, find natural window light, use a simple background, and take at least 20 photos to get a great shot.
-
How long does it take to get business headshots?
Time varies by method: DIY takes 30-60 minutes of shooting plus editing time. Professional photographers require scheduling and typically deliver final photos in 1-2 weeks. AI headshots are the fastest — about 10 minutes from upload to download.
-
Are AI headshots good enough for LinkedIn?
Yes. Modern AI headshots are nearly indistinguishable from traditional photography. They're used by professionals worldwide for LinkedIn, company websites, and business cards. The key is choosing a quality AI service and uploading good source photos.
-
Should I smile in my business headshot?
Generally yes. Research shows smiling headshots receive more positive responses and make you appear more approachable and trustworthy. However, try both smiling and neutral expressions to see what works best for your industry and personal brand.
-
What background is best for business headshots?
Simple and uncluttered backgrounds work best. Popular options include plain gray or white walls, soft blurred backgrounds, or subtle office settings. Avoid busy patterns, cluttered spaces, or anything that draws attention away from your face.
-
How often should I update my business headshot?
Update your headshot every 2-3 years, or sooner if your appearance changes significantly (new hairstyle, glasses, weight change). Also update when starting a job search, getting a promotion, or if your current photo no longer represents how you look in person.
Get Your Business Headshots Today
Whether you’re updating your LinkedIn, joining a new company, or just want to look more professional online — you now have three solid options. DIY if you’re on a tight budget, hire a photographer for the highest quality, or try AI for the best balance of speed, cost, and results.
Same selfies, completely different styles. Corporate for the boardroom, casual for your startup — get them all in one session. See your preview free.
 Corporate
  Creative
  Casual
  Friendly
  Modern
  Executive Corporate Creative Casual Friendly Modern Executive Corporate Creative Casual Friendly Modern Executive